Posts

Showing posts with the label after picture

Front of the House Makeover

Image
When we returned from our RV trip we found a citation for an "unkempt" yard from our town hall. No fine but it was still very annoying. YES, we were aware of the state of our yard but we went on vacation. We also got one from our neighborhood association, thanks to a nosy neighbor who took a picture of our yard (with the RV in the driveway) to report us. Really cool.  The truth was, we had already called a landscaping service to pull it all out, and, in fact, had been waiting for their estimate when we got the city's notice. We quickly learned landscapers have been abnormally busy this year, so it took a few weeks to get the estimate and on the schedule.  Finally, I have some before and after photos for you ...  We also did the other side of the house, but I don't have photos of that side. It's much the same: weeds to grass seed.  The plan is to sod and get grass growing in all the cleared out areas. And, eventually, add something like hydrangea along the front po...
A Fun Before and After of the Stairs

Image
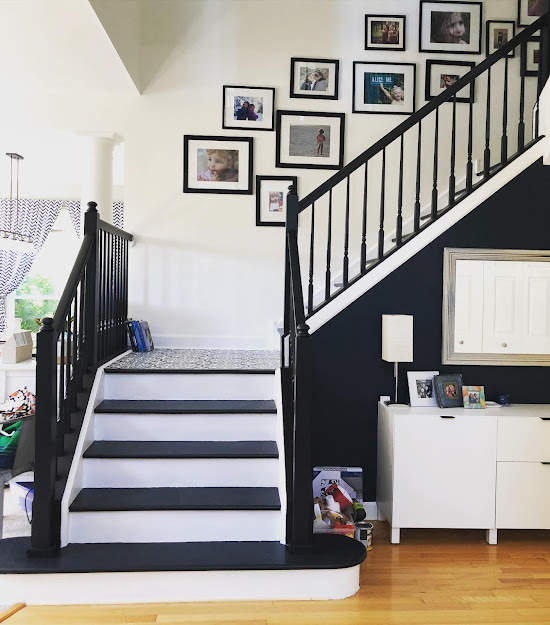
This may be one of my favorite house projects ... mostly because it's in the heart of our home and gets used every day. And I had been imagining it for a long time. But also because we did it so quickly. We talked about it Saturday morning and by Sunday afternoon I was painting.   Here's our AFTER photo ...  And here's the BEFORE photo that I found from 2016, after our Halloween party.  The big questions ... is there dog hair all over the stairs?? Yup, there sure is. But we can wipe down the stairs when we're cleaning up. Can you JUST imagine all the hair and dirt in the 20 year-old carpet?! Gah!  I added this peel and stick wallpaper to this half wall to add a little visual interest and it's a fun element to see each day. The girls didn't like it at first, but it's growing on them.  So now I've just got to finish up the spindles on the second floor -- and there's A LOT of them. Hoping to wrap up this week.  Such a fun style update to this dated hous...

Now a Pretty Little Bathroom

Image
It's kinda amazing what $150 can do to a space. For the time and effort, I'm happy with the results. So I painted the walls using leftover paint from the master bedroom ceiling angle. Then I used peel-and-stick wallpaper on the wall with the vanity. Last, I used vinyl floor tiles for the flooring. All knowing that in a few years, this bathroom will be gutted and updated -- once we don't have young teens. They are slobs! To finish it up, I just need to pick up a few bathroom rugs for the space this weekend. Here's the BEFORE picture again: And more of our After pictures ... The floor tiles were NOT PERFECT. If you look close, you can see where the patterns don't come together. I struggled with this at first, you can rotate the tiles to try to get a better match. But it was futile. And from afar, it looks awesome. So, I'm pretty happy. It didn't need to to be perfect. Here you get a view of the new light fixture that I didn't budget fo...

Master Bedroom's Creamy Angled Ceiling

Image
Yes, there certainly was a lot of UP AND DOWN on the ladder to get this angled ceiling in the master bedroom painted, but it didn't take too long (a few interesting podcasts) and I'm very happy with the results. Much happier than the willow color I had picked out before. The transition into the ceiling is a little cleaner and airier. And it picked up the cream color of the curtains, but different enough than the white trim. Here's another Before pictures of that curly willow color. You can s ee more master bedroom BEFOREs and a full run-down of this minor project here . PS. The new color is "Pearly Cotton" from Magnolia Home. It's also worth noting that the whole idea of this Master Bedroom "touch up" was to calm the whole room down, and make it more tranquil. I pulled down art and family pictures to let that awesome blue wall just breath a little. The TV wall used to be jammed with three pieces of dark-wood furniture. It was a lot...

Entering the Master Bathroom Progression

Image
This is the view walking into the master bathroom from our bedroom. Notice the Door Opens the WRONG Way AND the Light Switch OUTSIDE the Room Related posts: Need a reminder of what this space looked like? See the BEFORE pictures More Bathroom posts

The Master Bathroom in Progress

Image
Work continues in our master bathroom. We're in our fourth week and it's looking good that we'll be close to done by Friday. Fingers are crossed. Here are some in-progress pictures ... Floor Done and Grouted The Shower Gets Enclosed The Start of Subway Tile  Before Paint ...  After Two Coats of Wall Paint It's been so fun to watch this all come together. Related posts: Need a reminder of what this space looked like? See the BEFORE pictures More Bathroom posts

The $80 Kitchen Pantry Update

Image
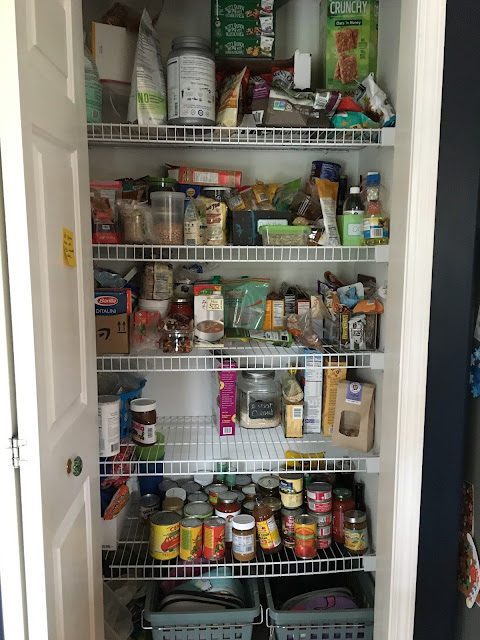
It took two days and about $80 in supplies, and now our kitchen pantry is REBORN! Here's a quick review of the project in pictures, starting with the BEFORE pictures: My main issue with the wire shelves were bottles or anything "thin" would tip over. And with my commitment to bulk, I wanted to store glass containers in here but knew they wouldn't be "safe." I foresaw broken glass at some point. Plus, it's a great space, so I knew I could add more storage space if I was strategic. Last, wire shelves are ugly. So then I demo'd the pantry and painted the walls (which was just primer) with leftover paint from the rest of the house. It's called Polar Bear. I paid an electrician to install an outlet at "counter height" in the pantry, so I could move the dumb microwave off the counter. (The electrician did a slew of other small jobs around the house, not just this outlet, including a motion-activated light in this pantry. Tres Fancy...

Dramatic Laundry Room Update Complete

Image
I'm just to the point of puttering in the laundry room, so we're considering the improvement project "done." Yes, I have a little checklist I'm still ticking through, but the big stuff is complete. So, here's the dramatic Before and After pictures of our  Laundry Room . To recap the issues: The floor was hideous and cracking in some places, The utility sink was a mess and the faucet was puny and wobbly, There was no closed storage, so all the things we stored in here were totally visible, The wire shelving made it look like a closet, not an actual room, We needed wayyyy more storage (cabinets, preferably) for this room to reach its potential, The walls had never been painted, they were still primer. This was the plan that I sketched out in Paris ...  Washer/Dryer Wall Plan Closet Wall Plan And, finally, here's the finished result ... We love, love, love it! It's such a prettier room and bright. More updat...

The Glorious Hallway Makeover is Complete

Image
I loved all my options but the budget/time factor just got to be too much. We really just need something to keep it organized and looking nice until we permanently move home. So, we drove to Ikea and spent about $130 on three Billy bookcases , and $50 at Home Depot getting more of the white paint ("Polar Bear" from Behr) for the walls. And that's it. AFTER: White and Clean and Full of Books! Honestly, I'm so happy with the results, I could do cartwheels! Here's that Before picture again ... BEFORE: Reminder, This is What It Looked Like Painting the walls only took me a day. And the Ikea Billy shelves had to be propped up a bit, so we rigged up some scrap wood we had in the basement to ensure it was level on the carpet. We also installed the topple-guards. The books were piled in a few corners (the bookshelves were moved to Paris), so they now have a good home. I might install some quarter-round trim to give it a more "built-in" look, but ...

Wall of Restraint NO MORE

Image
Yup, so I broke down and nailed a piece of wood to this wall. So there. The Bisecting Piece of Wood I didn't secure it too tightly, so basically I'm still looking at it as temporary. I keep walking past it thinking ... do I like it there? Is it annoying? Will I want hooks on it? Will it look better once the whole wall is white? Etc. Etc. Sometime decorating your house just takes extra time and thought. Related Posts:  Here's where I coined the term The Wall of Restraint So, here's the post where I congratulated myself on  not installing hooks on this wall. And here's the post where  I installed hooks on the wall near it . And, lastly, here's the post from 2012 when  I was so in wuv with this pea green color.  

Behold! Everard Blue!

Image
Here's the After picture of our master bedroom now that the walls are a dark and moody blue. Maybe the best part is I was at work while the painters were here, so I walked in and found -- as if by magic -- the room no longer minty green but a bold blue. That's pretty awesome. They also painted the trim an eye-popping white, which I just love against this blue. And the angle is a dark beige-y, tan color that I hope goes with the headboard. I spent the evening cleaning and re-hanging the drapes, and moving the furniture back into position. It will be a while before I dare hang anything in here. I'm too in love with the walls to put too many holes in them right now. So, just in case I'm looking for this information later: The walls are "Everard Blue" by Benjamin Moore . And the tray is "Curly Willow" by Behr . Now, does that furniture look too dark against the walls or is it just me? And wouldn't a lighter wood or white look fabulous agains...

Lovely New Living Room Floor

Image
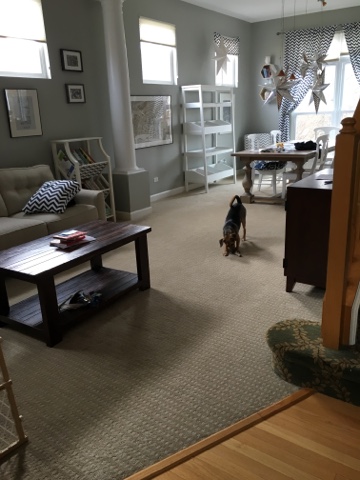
When we started talking about this flooring, way back on Friday, I would have said no to more carpet. Having a dining room table on carpet is odd. But after discussing with the floor guy and looking at some samples, I got pretty comfortable with it. Ideally, we would continue the hardwood floors from the house into the living room/dining room but unless I discovered an elf with magical flooring powers that can match the 15-year-old wood, it's not going to happen. So, we got new carpet that's designed for the traffic and use of this room. It's low pile (but not berber, that snags!) and very family friendly. And it was installed in about 2 hours. Obviously, the dogs are very happy on it. New Carpet Now that the furniture is moved back, and not the clutter, it is making me rethink all the junk that sits on those white shelves. Do we really need it? Also, that coffee table really should be white, right? Related links: More posts about the Living Room 

Entryway Project is Finally (Mostly) Complete!

Image
Three coats of white semigloss paint and four hooks later, the mythic Board and Batten Project is now complete. The crowd goes wild! AFTER: With Hooks!  Now begins the positioning of random pieces of furniture until I hit on the right ones. This might lead to a trip to the flea market for a super cool, long, rustic bench.  AFTER: With Stuff! Related posts: All the Entryway posts