Posts

Showing posts with the label projects

The Bookcase Update

Image
The office is really coming together! Once the wall was clear and open, I was trying hard to picture how I wanted to assemble the book shelves. Because I need bookshelves here, but I don't want to weight down the space like it was before. I narrowed down to two options (based on all the pretty pictures I've looked at on Pinterest, Instagram and HGTV) ... Option 1) three shelves going almost wall to wall, or 2) two sets of three shelves and a piece of art in the middle. Here's the thing about making these big design decisions: you need to take time to research and find something that feels right. There's a gut feeling about these things. BUT the important thing is to not let it stagnate and go stale. Trust your gut. If there's a happy feeling inside, that's the right decision. So I mocked up the two options and posted it on Instagram Stories and took a quick poll. And this option won by 5:1. Next step is sourcing the brackets, which is the only item I...

My Paint Chip Art!

Image
File this as another upcycle art project that I'm so fond of these days. With the Paris move , I'm looking for ways to get things OUT of my house. Some things I'm just tossing, but if it's usable material, I'm going to use it. So you know those paint chips AKA "color samples" you collect at the hardware store? Well, as I've painted every room of this house, I have about a million. Maybe billion. And they're all such pretty colors, of course. This summer, Leah brought home a little mosaic art project that used these paint chips and I thought, how genius! What a great way to put those little, colorful paper to use. Voila ... I created these ... I had these largish white frames that I picked up at IKEA. (I'm pretty sure it's impossible to go to IKEA without buying frames, there might be a way, but I haven't found it.) And I decided to use them to replace the two very old boxwood wreathes above my mantel in the family room. Obvio...

The Ugly Frame Project

Image
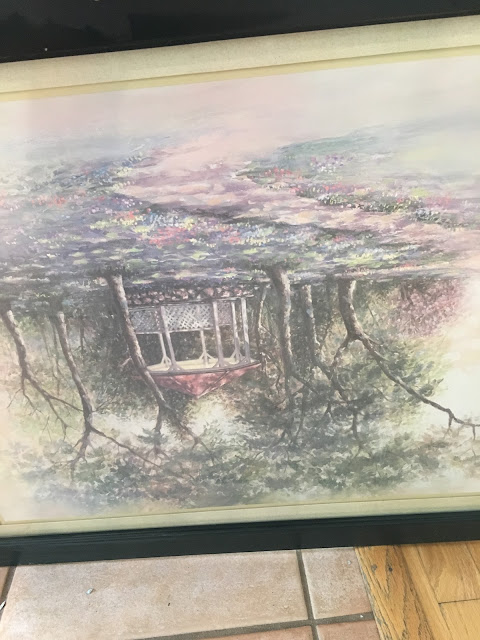
My Mom tends to find things at thrift stores and drops them off at my house. A few years ago, I got this framed picture of a gazebo that's so far from my taste, I almost threw it out immediately. But she pointed at the frame and thought I could make something of it. So it went in my basement and there is stayed for a few years. For whatever reason, I thought of this framed picture while in Mexico and thought I could use it as a wipe board in my basement gym. It's So Ugly I Didn't Bother Turning It Around So, I pulled off the paper and removed the staples holding the back in place. It was really no problem. The frame was no longer in great shape, but it's a exercise board for the basement, it doesn't need to be gorgeous. I dug out my old freind Rusoleum in a hunter green color -- the darker to hide the imperfections of the frame -- from my spray paint collection in the garage. While I waited for that to dry, I gift-wrapped the gazebo print in cr...

Guess What!? I Love Crafting!

Image
If there's one thing I take away from this little sabbatical as a stay at home mom it's this: I really enjoy creating things with my hands. When I was a working full-time, driving kids around, stressing about dinner and passing out at the end of each day, crafting was very low on my daily priority list. Weekends were about spending time with family, maybe painting a wall and reading. Not much else to cram in there. But now that I'm home all day and have gotten some really big house projects done, I'm able to indulge in just crafting to craft. And with the holidays, I have the best excuse to create holiday decor things for family members and to pretty-up the house. I forgot how much I love to make things. I have bins and bins of crafting supplies that I've been collecting here and there but never had time to sort through and create. Now free time is finally here and I'm totally indulging in it ... and feeling sincerely grateful for it. Anyway, here's ...

Day 1: Plans for Being Home

Image
Today is my first day of unemployment. I gotta say, I underestimated how quiet it would be around the house. I've been playing Amazon Music stations on Alexa in the kitchen as I've been getting to my various tasks for the day, but it's still pretty lonely. Anyway, there's so much that I want to get done in the next two weeks, I'm not really thinking too much about the solitude. Besides, I have the dogs to talk to ... when they're awake. I've been working on new lists and looking over house project lists that I've made in the past. I'm this-close to creating a spreadsheet or Gantt chart! There's just so much I want to accomplish. So, here I am: Brimming with time and anxious to get so much done that it makes this all worth it. As I see it, I've silently asked my family to put up with a little less income for a while, so I owe it to them to work my hardest to make that sacrifice worth it. I'm starting with smaller reorganization...

Weekend Projects: Hooks and More!

Image
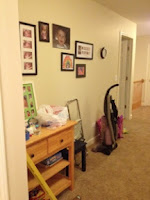
Last weekend, with great weather and a light schedule, gave us the perfect opportunity to get some house projects done. Hooks: I 'd been thinking about shuffling around the hooks in the house, to maximize organization and some storage issues that crop up during our busy weekday schedules. I just can't stand when we're not using this house to it's fullest potential.  So, despite all the new holes I put in my walls, think I created some more-usable spaces.  Sorting Station This area below the stairs held family photos and a large lamp. In the switch-around from several weeks ago, I decided it would make a good landing place for bags, backpacks and eventually the hats, mittens and scarves.  Here's this area now, with the addition of hooks and assigned storage.  After: Decluttered. With Hooks. Photos: The spot over the sofa in the parlor also needed some attention. In the hallway shown above, I had picture ledges that were gettin...

Green to Blue on the Entryway Wall

Image
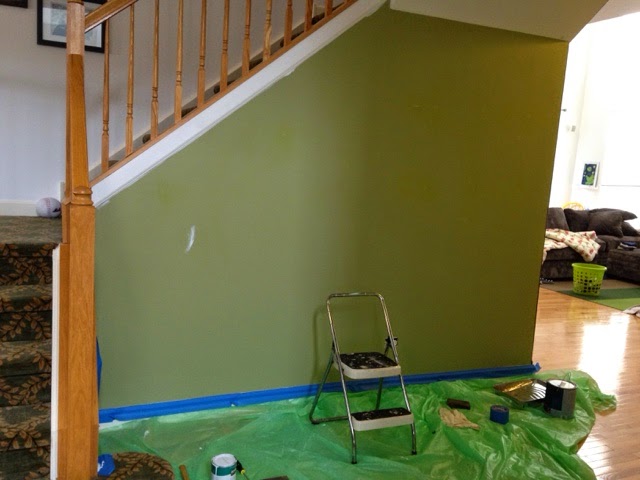
Because I'm me, I painted another wall in my house. This one is in the front hall. I painted it green not long ago, but decided this winter that I'd rather have it navy blue to continue the color throughout the main level of the house. This wall you'll see as your enter the house, so it will have big impact. BEFORE: The Green Wall AFTER: IT'S BLUE! I really need to figure out what furniture will sit in this spot. But, until I do, this little white bench will have to do. Related posts: Other Home Improvement adventures

These Terrible Old Windows

Image
The workers are here installing the new windows. It's cold but sunny this morning. I've offered coffee but they're down to work. They're speedy. While we watch and watch for new efficient windows, here are a few BEFORE pictures. Note the girls have been using dry-erase markers to decorate their windows. Alice's Naked Windows Just In Case You Thought I Was Exaggerating, Here's the Crack Around Alice's Window The Patio Doors - The Wood Trim Never Matched Anything Else in the House Leah's Window. Many of The Windows Closed with This Efficiency, Which Is to Say, Open a Crack Leah's Corner Windows Also of note, poor Benny is beside himself with anxiety. The noise of the saw and the men walking around is giving him frequent heart attacks. Related posts: Here's all the New Window posts Other home improvement projects

Work Continues in the Entryway

Image
This weekend we got started on the entryway. Finally. We were having some people over and wanted to clean it up and start construction before the party. So Dave hit the Home Depot Saturday morning with my schematic and in 45 minutes, we had wood and nails. Before : Picking Up the Entry Rug and Cleaning Out the Furniture While he was away, I marked all the studs and picked up the current carpet tiles, which were supposed to be temporary when we put them down three years ago. The rails went up very easily and quickly, but with very loud hammering; we had to stop at bedtime. The vertical rails will be next (likely over Memorial Day weekend) and then painting them all a glossy white. After : Navy Carpet Tiles and the Start of the Boards on the Left The rug in the entryway is dark navy flor tiles, which will match the outside of the entry door (when it gets warm enough to paint outside). And this rug is longer than the last one, going past the piano. The rich color really...

The Quilting Plan - Supplies

Image
Slowly, over the course of several years, I've been collecting supplies and fabric to assemble my first quilt. It's a goal I've had for quite a while. And being the granddaughter of one of THE BEST quilters in the state of Florida, the skills are in my DNA! On my last trip to Jo-Ann's I found the last puzzle piece: quilt batting. Of course, it's the smallest size I could find ("crib size") and made from recycled fibers -- supper soft! So I've got my book and my fabric pieces and a plan. Now, I just need a free afternoon to tackle it. Quilt Supplies: Ready When I Am

Halloween Illuminaries Project

Image
I'm hosting a big Halloween party this year (more on that later) and using it as an excuse to get crazy crafty. So, you've seen the awesome owl wings costume . Here's another little up-cycling project that cost me ZERO dollars. 1. Start with salsa and pickle jars.  I've been collecting these for the last few weeks. (We eat a lot of salsa.) Start With Glass Jars 2. Paint them a base color. I choose acrylic paint from the kids' craft set, in white and green. Let them dry completely. (If you'd rather glue, get out some crepe paper in similar, spooky colors and glue to your hearts content.) First Coat Done 3. Paint ghostly and Frankenstein faces on the glasses, drop candles inside and ... viola! ... fun and almost FREE Halloween luminaries!  Done - Ghostly and Free!  Relate posts: Read more Craft ideas

Deadline Owl Wings

Image
I've given myself to this weekend to finish the owl wings for Leah's costume. So here they are, feathers are sewn down and bias tape ready to be zipped through the machine. Sunday Night's Progress One problem: Uh oh ... That's Not Enough Thread! That's not going to get it done. Sigh   

Costume Planning for Halloween

Halloween is right around the corner and we're full-speed in the spirit of that most-fun holiday. Leah has decided to be an owl this year. And I, in turn, have decided to make her costume. I found instructions on how to make wings here (a blog called Prudent Baby)   but will use browns and oranges instead of the pretty pinks and blues. And if I feel really ambitious, I'll add feathers to the shirt, too! ( Like this. ) I was at the fabric store last weekend, rummaging through the remnant piles for owl-colors. And will need to make another trip this weekend for more oranges and reds. Then, a search through Etsy.com to find a felt mask -- that I can either remake or buy (likely buy -- I don't have THAT much time.) As for Alice, she's still deciding. For weeks, it was clear she was going to wear her Ariel costume (all that's missing is a red wig), but lately she's wavering. I heard her talking about being a witch or wizard. I gave her a Sunday deadline to m...

One Year Later!

We're celebrating our one-year anniversary since the big move from New Jersey to Illinois. We moved into this house on Dec. 16, 2011. Hooray! A lot has happened since that exciting and exhausting day. The girls have started school and made friends. Dave has made big contributions to his projects at work and I landed a full time job. I learned that we function best when both parents are working full-time and the girls are in structured school settings. And that I'm a hopeless stay-at-home Mom. Maybe it’s just not in my DNA. I painted six rooms, mostly by myself, learning tricks and making a few mistakes. I've enjoyed planning and decorating. There's nothing better than the feeling of visualizing an idea (Flor carpet tiles! Homemade curtains! Raised beds gardens!) and following it through.  It's great to have the space to make home improvements. To start projects, to stretch out and make a mess and to close the door of the office or leave it ...

Hallway Construction Zone: Idea 1

Image
The Space In Need Outside the bedrooms is large space just calling for a built-in of some sort. Today I'm feeling adventurous. Get this for a plan: I was wandering around Loews today with the girls and found some unpainted cabinets. If we got two cabinets and attached them to the wall, founds some countertop material to connect them, you could get a very built-in look for under $250.  There is also some upper-cabinets, though I think I'd prefer open book shelves above. 1. Unpainted Cabinet = $67 2. Thinner Cabinet = $51 3. Laminate Counter in Assorted Colors = $50ish (depending on length) 4. OR Use a Solid Pine Counter The TWO big questions is: 1) Are my math skills good enough to figure this all out? 2) What color should I paint everything? Or stain it?  Only time will tell. Stay tuned!

Terrarium Fun!

Image
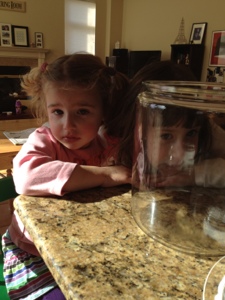
I've been excited to put together of a terrarium since the move. So, last week I found a kit from Etsy and cleaned out the glass jar we got as a wedding present, and have been kicking around. Presto! Terrarium! My Helpers and an Empty Jar - Ready to Go! Done! Complete with Gnome.

Valences Gone - Totally Worth It

Image
Large upholstered valences once hung above these windows in the master bedroom. In my expert design opinion, they were too large in scale, unbalanced the room and drew attention away from the windows and tray ceilings. I'd lay in bed at night cursing at them, while they taunted me from on-high. Despite the small holes left in the walls, removing them does wonders to lighten up the room -- and my stress. Don't you agree?! :) Now, what to do about the drapery?