Closet? You'll Love It!
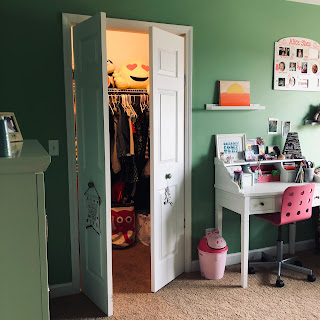
 While upgrading the girls' bedroom with paint and a few furniture swaps, we fixed up their walk-in closets, too.
How? We changed the bifold doors to French doors!
Why? The bifold mechanism kept falling off the track and it was incredibly frustrating. In fact, I pulled off Alice's doors after several failed attempts to get it back on the track. And not too gently, if you know what I mean. 😡
 |
| No Mortise Hinge |
The Bifold to French Door How-To: Before taking the doors down, I made pencil marks on the door frame and the door at the same height. This was so when the door went back on, it would be at the right spot.
I detached the door from the frame and track then removed all the hardware, including separating the doors. (Bye-bye bifold!) I did a quick paint job and added a second hole for the other door pull. While they dried, I predrilled holes in the door frame and door, using the hinges as a template. Last, I used the screws from the hinge sets to hang the doors -- because I already pre-drilled the holes, it was pretty easy. Prep is everything.
I got magnets/plates so I can create door stops, too. But I only put it up on Leah's door. I have to finish up Alice's when I get a minute. Overall, it was a pretty simple project, once I got the right solution in place. And we spent a whooping $8 on the hinges; the paint and door pull I already had squirreled away in the basement.
Move all clothing INSIDE the closet. They're so lucky to have walk-in closets but they were often black holes of lost things. And they barely contained clothes or anything useful. So, we talked about it and decided to move all the clothes, including a dresser or two, into the closet -- making it the "room for clothes."
 |
| Alice's Closet. She Has a LOT of Clothes |
But once we had everything in place, it looked pretty cool. And the girls are finding it much easier to get dressed in the morning and put away their laundry. Everything has a place. And they can SEE everything.
We did this in our master closet, as well. The dressers in our bedroom are now for long-term storage, not everyday apparel. Before, we walked from the closet, through the bathroom and into the bedroom for a t-shirt from our dresser. Or socks. Now, we moved everything, including a spare dresser, into the closet for quick access.
It's made a big difference. Now, bedrooms are for toys, stuffed animals, books, papers, etc. And clothes have their own space. Done.
And I never have to pull off a closet door in frustration. (Though, there are a few other bifold doors in this house that should be nervous.)
And, yes, the blog post is a reference to a Modern Family episode I've seen too many times. Give yourself 50 points if you figured it out.
Related links:
This was the most helpful DIY instructions I found for the door conversion
The first post about the girls' closets from 2013!


Comments
Post a Comment