Posts

Showing posts with the label Bathroom

Bathroom Renovation Planning

Image
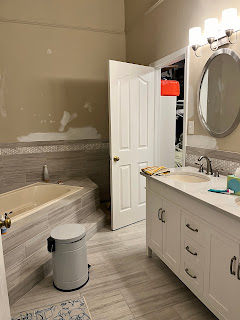
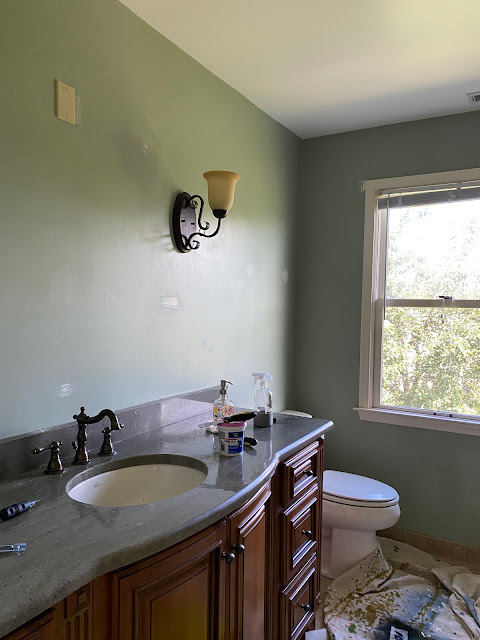
 Here we go again!  Our girls' bathroom has long been the last room on the checklist that sorely needs a renovation.  The current pictures tell it all; the vanity is outdated and faucets are leaking, the shower has plastic tile and a dangerous angle in the tub that I've nearly slipped on. The shower head also doesn't turn off all the way and leaks often.  It's dated and dumpy.  And here's a breakdown of our goals for the renovation: updated tile that's bright and pretty. A new vanity with lots of storage and two sinks for our two daughters. A larger mirror for maximum users.  A walk-in shower is going to be key. Not only for the older guests but it will just look better. We have a new tub in our bathroom, in case you're thinking "what about resale?!" Which I don't normally consider. Everything is pretty much staying where it is, no major plumbing or electrical is going to be involved, just getting refreshed and working properly. This Fall!  ...
Our Bathroom Is Done

Image
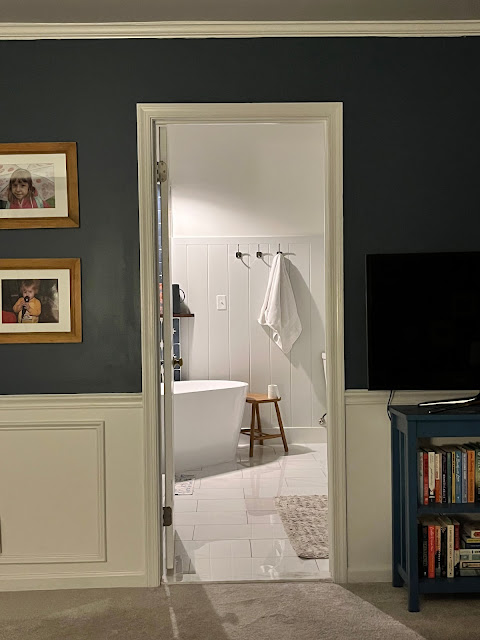
Completely forgot to post the final bathroom pictures. We're so pleased about the way it turned out. And the room feels so much larger First, this might be the most important view. It's what I see from bed while I'm reading at night. Before it was super ugly, especially when I put paint samples up on the wall. And the terrible tile around the huge tub and all the junk we put on it. Isn't this dreamy?!  And here's the tub accent wall with the new light, ledge and the gleaming shiplap painted with water-friendly paint.   Before I forget, the paint color on the shiplap is SW Fleur de Sal and wall is SW Greek Villa . The floor is a cheap porcelain tile and this star tile is from Home Depot.  The blue tile in the shower is the one thing I would change. I love the dark blue but if I had another go, I'd pick the denim color I looked at. OR a white tile to really brighten the room.  On the other hand, I'm so glad I used the same vanity and mirror/lights. I'm so...

Surprise Bathroom Reno

Image
 Surprise! We're renovating our bathroom!  At the beginning of August, we noticed a wet seam in the ceiling of the kitchen. We assumed it had something to do with the kitchen renovation last year, so we called our contractor to come out and take a peek. Lo and behold our toilet in the primary bathroom, just above, was slowly leaking.  Gross. To sum up, we got the mold remediation guys involved, submitted a claim with our insurance company and hired our buddy General Contractor Bruce ... and now we're renovating the bathroom.  Look, in the back of my mind, while I'm falling asleep at night or while strolling through Pinterest, I have thought about what I'd do when the time came to redo that bathroom. When we moved in, it has been "updated" with grey & white matte tile and marble hex tile. But the bathtub takes up 80% of the bathroom and the tile was never sealed, so it grows dirt/mold like no tomorrow. And it's painted an offending beige and you know h...

I Tiled! I'm a Tiler! I Tile Now!

Image
 One of the DIY merit badges I've been excited to earn was as a tiler. Every show and contractor/construction guy I've talked to has been insistent it's an "EASY" DIY. "You can totally do it," they say. But I never had the opportunity to give it a go. A nice easy low-risk project.  Until the powder room!  I gathered up my courage, watched all the how-to videos, picked up all the supplies needed (about $250 with the tile) and took a deep breath ... and just GOT WENT FOR IT.  Everything is figuroutable, right!?  It was easy, though there were definitely lessons learned. And quick solutions I had to come up with. But I would very confidently tile another small wall.  First, here's a photo of the IN REAL LIFE mess of a room mid-project. It's important to be OK with creating a mess. Tiling is messy.  Here's the room after the tile is up (took about four hours) and the clean up. Hauling clean water in and out of the room was the worst part. I'l...

New Floor and Vanity in the Powder Room

Image
The downstairs powder room is really coming together much faster than we thought. After an initial text with our contractor, once we had all our materials picked out and our vanity delivered, he was able to fit us in THE SAME WEEK due to a two-day hole in the schedule.  So BAM! In two days they removed the old vanity and floor tile and had to new floor down and vanity nearly installed. Ugh, there was a minor plumbing issue that got resolved on day 3, so on day 4 they officially installed the vanity and were done.  Here's where we started, to where we finished off with the contractors ...    Also! I was able to sell the old vanity on Facebook Marketplace for $350!! That was a solid piece of granite, people! And got it out of our garage in less than 24 hours. A new record!  Next up ... TILE!  

Powder Room Design Board

Image
This winter I'm all about updating our Powder Room -- the bathroom off the kitchen our guests use. It's ugly. Just plain ugly. I painted it last year and switched out the horrible light fixtures, just to improve it a little, but now I'm ready to tackle it. Before - The Powder Room when we moved in With a small budget, I was planning to work with the vanity and either paint or tile-over the floor. I think the floor is the main issue. Replace the faucet and tile the wall. Maybe some kind of window treatment. Oh, and replace the towel bar with hooks. I really don't like towel bars. They never look organized -- always messy.  But Dave offered $3k from the house budget ... and I was off to the races! I'll hire a handyman to replace the floor and install a NEW vanity. Yay! And I'll tile the wall and paint the remaining walls.  Now, I have to make a decision on the vanity. They're expensive and will direct the rest of the finish choices. Here's the three choice...

Best Bathroom on the Block

Image
Is it the best bathroom on the block? I can't imagine a better one! Once I realized we were going to HAVE TO spend money on this bathroom and I'd have professional help to do it I thought I'M GOING TO MAKE THIS BATHROOM 100% BETTER. I'm not going to play it "boring."  In my overall plan, I envisioned a bold wallpaper above some shiplap/beadboard wall treatment. I wanted anyone who uses this bathroom to come out and be wowed. Blown away by this after-thought of a bathroom tucked away in the back of the basement.  I found a bunch of great options, but was completely sold when I found this Marvel comic book paper on Lowe's . So, I ordered it, despite being a bit of a splurge. My budget was good, thanks to reusing the same toilet, vanity and mirror from the current bathroom.  The other thing I changed was the light fixture -- from basic to this laquered red gooseneck from Lamps.com. I also ordered the same fixture in black, to replace the ugly sconces around t...

Green Be Gone in the Girls' Bathroom

Image
I love painting rooms ... until I have to do a bathroom. Sure, it's usually less wall area to paint, but I'm not a fan of obstacles. And contorting around a toilet or over a shower isn't my idea of a good time. Suffice it to say, I've been avoiding painting the girls' green bathroom because of this. Well, no more!  I needed a WIN this weekend and knew that bathroom was just the thing to get my home-project-heart pumping again.  Here's what we started with ... green and dirty walls, an old and ugly light fixtures and a mirror no one liked.  By the end of the day, we had creamy (yup, Swiss Coffee by Behr) walls and two new scones not covered in dust and grime.  I even hung some shelves, so they have more room to hang all their products (they love shopping at Ulta or Sephora).  I just need to incorporate more hooks for towels and hang the new/old mirror. They're taking the Target mirror I got a few years ago that's currently hanging in my bedroom -- a bit o...

The Powder Room Upgrade is Done!

Image
Our powder room is done and we're so thrilled! Mostly, I'm so happy with the new vanity because I loathed our builder-grade crappy one with no storage and a $5 plastic ball faucet. BLAH. This Kohler upgrade in dove grey was a FIND on the Home Depot website and is beyond gorgeous and perfect. We're in the second month of our quarantine, and it's projects like these that are really keeping my spirits up and my hands and mind busy. As with all DIY home projects, we learned A LOT: First on the list, we learned how to install shiplap! And it's pretty simple, as long as you have a level and a nail gun. And the results are eye-popping. Crisp and classic.  I ran into a little issue with paint, so I ended up doing three coats of this "dragonfly" by Benjamin Moore color, but the moody teal was worth it. All the white POPS! We learned to calk BEFORE paint. After paint, it just looked messy, like this. I came by with a small paintbrush and touched up this en...

Powder Room Work

Image
It's hard for me not to think about home improvements and DIY while we're all home for this quarantine. With work-from-home, school work, house work and puppy ... there's already a lot going on. But I'd feel like we're wasting the opportunity if we don't do some work around the house. So let's talk about the powder room. Last year, I did a quick update by adding some art ledges, removable wallpaper and a rug. Minor changes but made a big change. Here's what it looked like: Honestly, I think the phone camera makes that color look so much deeper and richer than it actually is. Anyway, I loath the sink and that faucet, especially. And Dave has been dreaming about updating the toilet. And the paint color needed to be darker. So I reached out to our contractor, Mick, to see if he'd be open to doing a few minor projects, as long as we stayed far far away. One was in the garage (more on that later) and then swapping out the pieces in this bathroom, ...

Now a Pretty Little Bathroom

Image
It's kinda amazing what $150 can do to a space. For the time and effort, I'm happy with the results. So I painted the walls using leftover paint from the master bedroom ceiling angle. Then I used peel-and-stick wallpaper on the wall with the vanity. Last, I used vinyl floor tiles for the flooring. All knowing that in a few years, this bathroom will be gutted and updated -- once we don't have young teens. They are slobs! To finish it up, I just need to pick up a few bathroom rugs for the space this weekend. Here's the BEFORE picture again: And more of our After pictures ... The floor tiles were NOT PERFECT. If you look close, you can see where the patterns don't come together. I struggled with this at first, you can rotate the tiles to try to get a better match. But it was futile. And from afar, it looks awesome. So, I'm pretty happy. It didn't need to to be perfect. Here you get a view of the new light fixture that I didn't budget fo...

The Glories and Pitfalls of Peel-and-Stick Wallpaper

Image
This bathroom makeover was only supposed to be $150. But, I had a small accident and now it's just a bit more. In Progress: Watch Out For Falling Lights! Peel and stick wallpaper isn't sunshine and roses to hang. It's sticky and doesn't like to be straight. I've done it twice before and I knew what I was getting myself into. So, this time I bought the smoother tool and an exact-o knife, so I was well prepared. Luckily, this pattern I chose DOES NOT NEED TO LINEUP PERFECTLY. It's glorious. You can't see the seams anywhere. It made life easier. What didn't make life easy, was the vanity light .. I was standing on the vanity, uninstalling the light and trying to figure out how I was going to run the wallpaper behind the light fixture when it CRASHED and SHATTERED to the top of the vanity ... were my bare feet were. GAH! I feel so lucky I didn't end up in the emergency room with glass coming out of my feet. Yikes. But, unluckily, it added...

Ugliest Bathroom in the House

Image
Now that the laundry room  and master bathroom have been made over and are looking lovely, they are no longer the ugliest rooms in the house. That honor now goes to ... the kid's bathroom! Take a bow! It's certainly on my "gut job" list, but, given the preteen slobs that currently use it, I don't think it's a wise investment. Maybe when Alice get to high school? But, I DO think I can throw $150 dollars in there in the meantime and upgrade the look at bit. We have family visiting at the end of December and using this bathroom, so I'd like it to look less like a catastrophe. Here's the current room -- I didn't even tidy it up. This is what it looks like in all it's glory. I think this filter is doing it A LOT of favors. It's pretty grubby. My issues are many (!) but, as I learned from the laundry room project , a new floor goes a very very long way. So that's what I'll start with. Given my tiny budget and DIY skills, I...

On My Bathroom Vanity

Image
In our master bathroom, I went from this long, crazy counter that was never organized to a small one that's all mine. So, I really spent time selecting and curating the most important things that I use and want displayed in my own little space. The Top of the Vanity I love having everything I need RIGHT THERE and it looks pretty and organized. A personal goal of mine for this remodel. And all the other bottles and things I don't want to see everyday has been tucked away in labeled bins inside the cabinet. (Yup ... I got out the label maker.) Starting from the top, going clockwise: Tom's of Maine toothpaste | bamboo toothbrush | Kiehl's Rare Earth Deep Pore Cleanser (use it almost every night) | Burt's Bees Night Cream (super moisturizing) | little wood clock | Beautycounter Overnight Resurfacing Peel (also almost every night) | WM Apothecary Hand Soap | jade roller (every morning to de-puff) | yellow hand towel | Marc Jacobs Daisy perfume | handmade...

The Bathroom Tile Snafu

Image
This one is on me. I went to Home Depot months ago and found the Metro Gris tile I feel in love with. It was shiny and blue/grey/black. Just perfect and lovely. And the right price. I built the entire color scheme of the room around this floor tile. All of it. Weeks later, I went on the Home Depot website and filled up my cart, double-triple checked everything, and hit BUY. Glossy in Front, Matte in Back Now, even more weeks later, the tile has arrive in the back of a huge semi truck on a palette and .... it's not the same as the tile sample I brought home from Home Depot all those months ago. *GASP!* I got these one: Metro Gris Glazed Porcelain Tile . I meant to get this one:  Metro Gris Glossy Ceramic Tile . But here's the thing: I think the mistake ACTUALLY is the better tile. First, it's obviously the same shade, "metro gris," so my room's color story is not in peril. It's pretty much the same. Also, the porcelain tile is proba...

Pizazz in the Powder Room

Image
Updating the first floor powder room, across from the laundry room, was definitely on my task list for this Spring. Mostly, replacing the single-basin vanity with a cabinet vanity. And maybe some tile. BUT ... as things go, we ran out of budget to buy a new vanity. (Maybe next year?) Nevertheless, I wanted to jazz it this week but stay on a very tight budget -- $100 max . I was thinking a new rug, light fixture and some kind of colorful statement. It all started at Target ... I walked past this leafy green peel-and-stick wallpaper ( Devine Tropical Wallpaper ) a few times before I tossed it into the cart. It's a statement for sure and on budget at $30. But would it work? First , I was very frustrated the last time I did this removable wallpaper installation ( see that post ). Second , but I totally loved it after it was all done. Third , I didn't think it would match the wall color, thus forcing me to paint that powder room -- as much as I love painting rooms, paintin...

The Master Bathroom Master Plan

Image
Now that demo is underway, here's the BIG plan for the room ... I've tried to keep most of the plumbing in the same place, which saves on cost and time. There are two pipes that need to move: the right sink and the bathtub. This doesn't show the closet, which is getting new paint, consistent flooring and LED lights. I created a budget, with price estimates on all the items that we need to purchase and a total. And I'm also keeping track of actual costs, and trying to keep under that estimate total. So far, I'm sticking to it. I splurged on a few things, like the sink faucets, but most things I got on sale or for a good price. The vanities were 50% off and the light fixtures were under $30/each! Fingers crossed we stay on time AND on budget.  Related links: Follow the whole Master Bathroom transformation

Demo Week in the Master Bathroom

Image
Here we go ... Day 1 focused on the vanities and the trim. The demo continued for a week, as Mick (our contractor) pulled out all the builder-grade junk and rebuilt the plumbing and added space for the shower.    Look at That NEW Tub! Our future shower ...  The week went quickly and with lots of I'm still shopping ... tile, some missing faucets, and wall color.